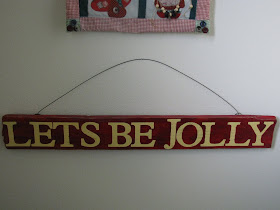
 I've been on Pinterest for a few months now, and every day I find more things I want to make. Here is where I found this idea :http://pinterest.com/pin/94646029638585698/- to give credit to the owner of this idea. I found this scrap of wood in a lot in front of our house, and believe me, it was scrappy- wet, dirt clumps on it and all. I took it in and let it dry off, sanded a bit, then painted.
 I used a buttery yellow for my base coat, and when it was dry, used my Cricut to make vinyl stencils. I painted over them with my red paint, and when it was almost dry, I peeled off the letters with my little Cricut pick-type tool..
To my delight, some of the paint came off with the vinyl. Normally I would be unhappy about this, and try and clean it up with some paint- but since I wanted this to look slightly distressed, it worked out great- and I didn't even have to try! (Always a plus :) ) I finished it up with sanding slightly around the edges and adding a wire hanger. I'm really happy with it, and it added the finishing touches to the decorations in our downstairs bathroom. I love the pop of the red. That, and you can't go wrong with the word "Jolly". It makes me smile every time.

No comments:
Post a Comment